In this section, we'll be using Chrome to do some of the testing, but other popular browsers support similar functionalities. Let's start with a quick solution that I tend to use to check whether a piece of code is actually reached.
Alerts
Sometimes when I try to trigger an event, for example by clicking a button, nothing appears to happen and I wonder if the code is ever actually triggered. In that case, it makes sense to create a small pop-up window that shows up whenever a certain event happens. In Javascript this is very easy to do, by calling the alert() function. Let's try it out in our login.js screen, when clicking the login button:
// Add the click event to the "login" button
button_login.on(Events.Click, function(event, layer) {
  alert('Logging in!');
  pages.snapToPage(chat_page);
});
This method of testing is also useful when you want to quickly review what the value of a certain variable is, or the outcome of a function. This can be less informative if your variable or outcome is of a more complex type than any of the primitive data types, though. For example, I can show the output of simple math resulting in a number:
var outcome = 3 + 5;
alert(outcome);
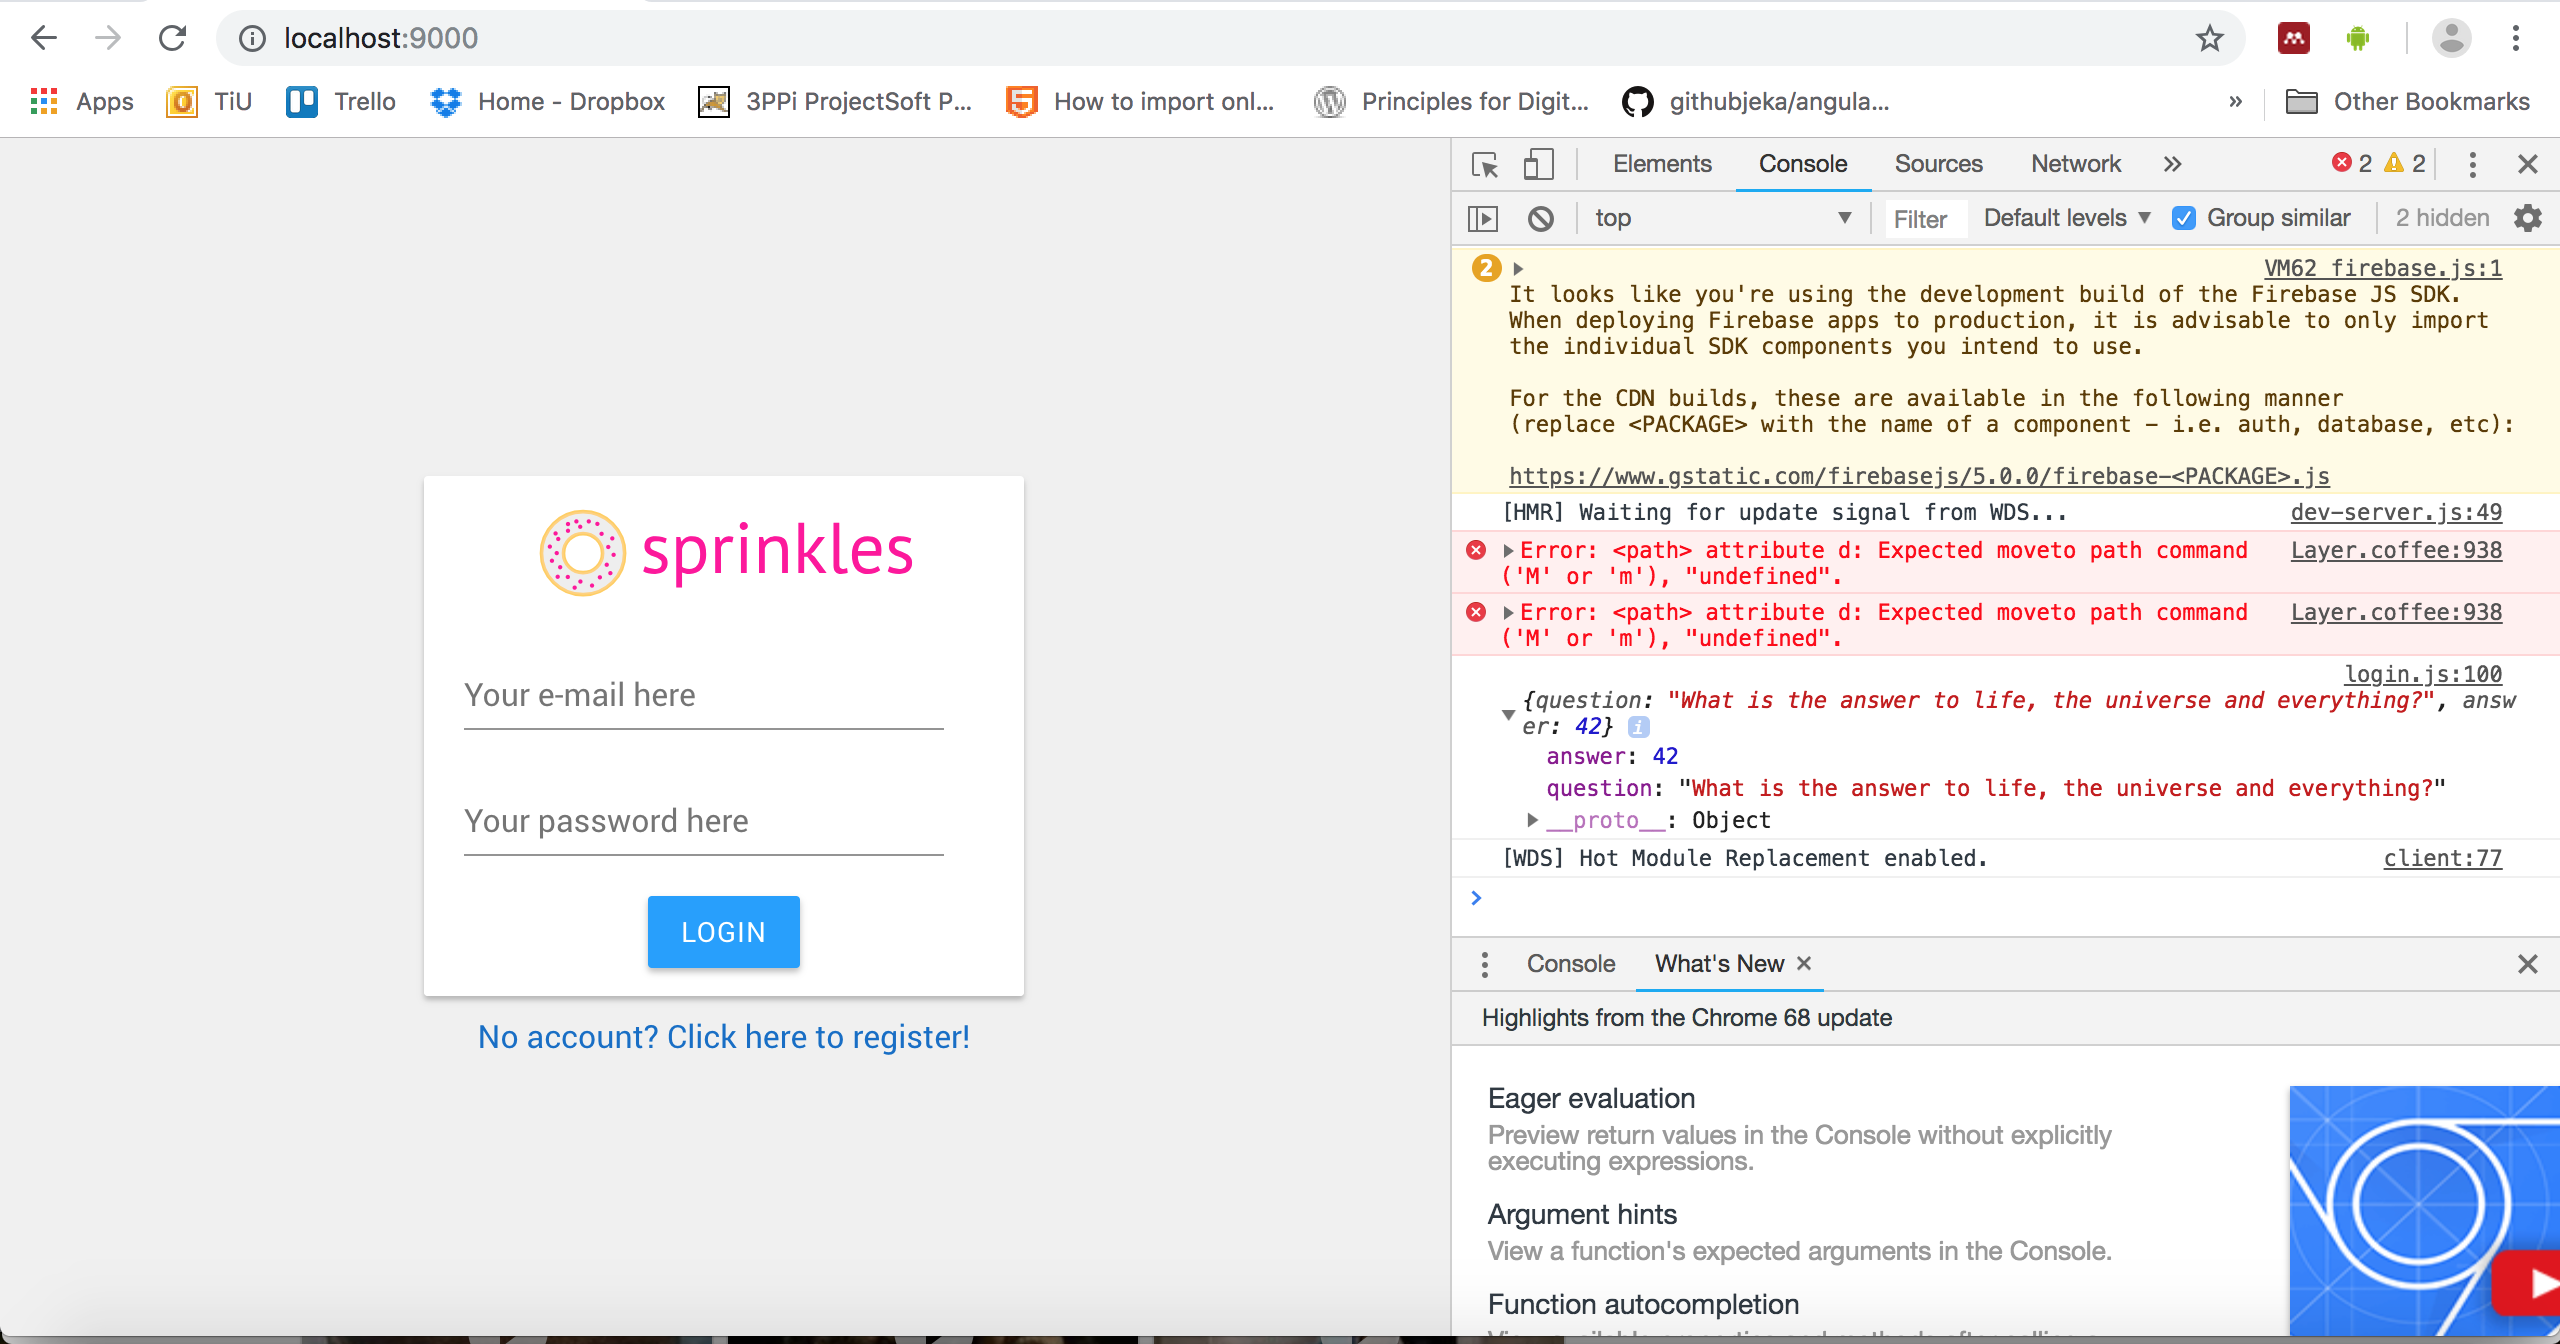
This will show a pop-up containing 8. But if I were to display a more complicated structure like a dictionary, we get less information:
var dict = {
    question: "What is the answer to life, the universe and everything?",
    answer: 42
};

alert(dict);
You will simply get a pop-up saying "[object Object]", indicating that we're trying to output a complex data type. For that, it's better to use the console.
The console
The way I generally use the console is similar to how I use alerts, but it offers a bit more information. To open the console, in Chrome, you can select the menu options: View / Developer / JavaScript Console. I believe this option should be visible in default, although in Safari you'll have to enable it first.
After opening the console, it should show up on the right side of your screen. All the frameworks and stuff we're using will automatically already put things there, but we can also add our own. For example, we can do exactly the same thing we did before, but then put console.log() instead of alert():
var dict = {
    question: "What is the answer to life, the universe and everything?",
    answer: 42
};

console.log(dict);
Note that you can "open" the dictionary by clicking on the arrow in front of it. This approach not only allows us to get a detailed overview of what's happening with our own complex variables, we can also use it to learn more about objects and properties that exist in JavaScript itself, or in our frameworks and modules. For example, try this:
console.log(Framer);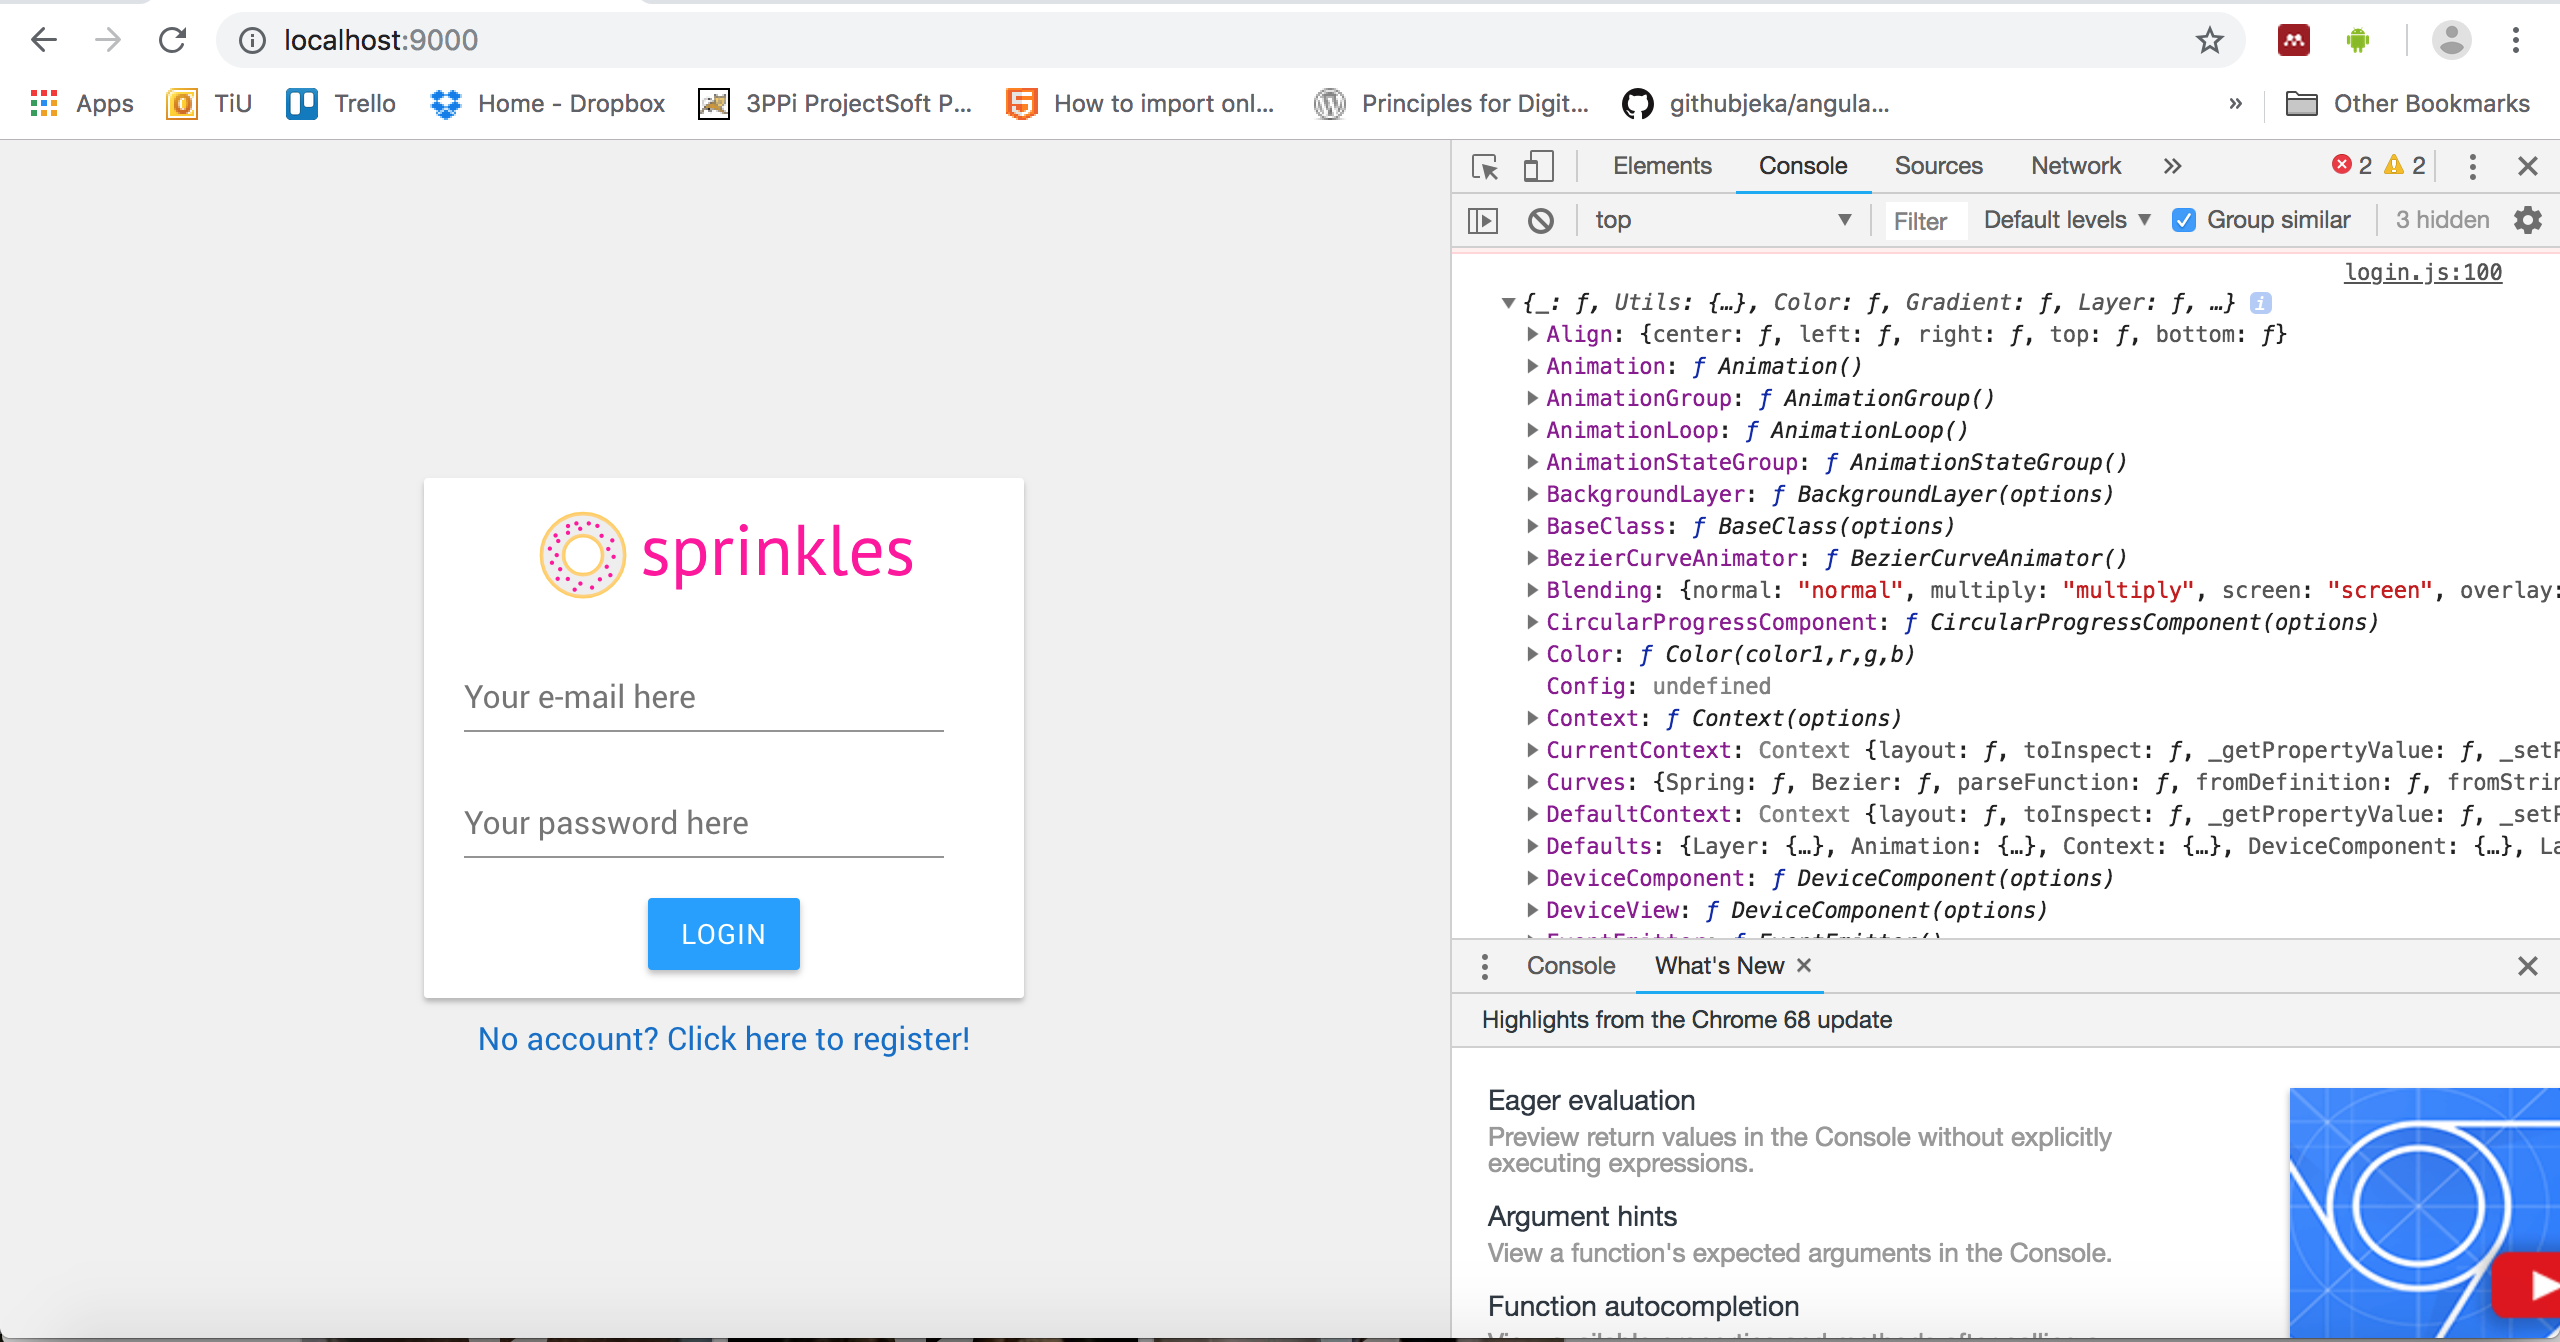
If documentation is lacking, it might be worth exploring using the console! Finally, you can also go exploring while in the console, for example by triggering alerts (or viewing objects) from there by typing commands into the window:

Inspect elements
Another nifty tool that can be found in the developer tools in your browser is the element inspector. You can access it by choosing the Elements tab at the top of your console window. Or, even more interesting, you can put your mouse on a specific element of the screen you want to inspect and right click on it, then select Inspect. This gives you all kinds of information about a particular part of your screen, mostly related to its styling, enabling you to try out different positioning and settings. Here, I increased the text size of our input field to illustrate this feature:
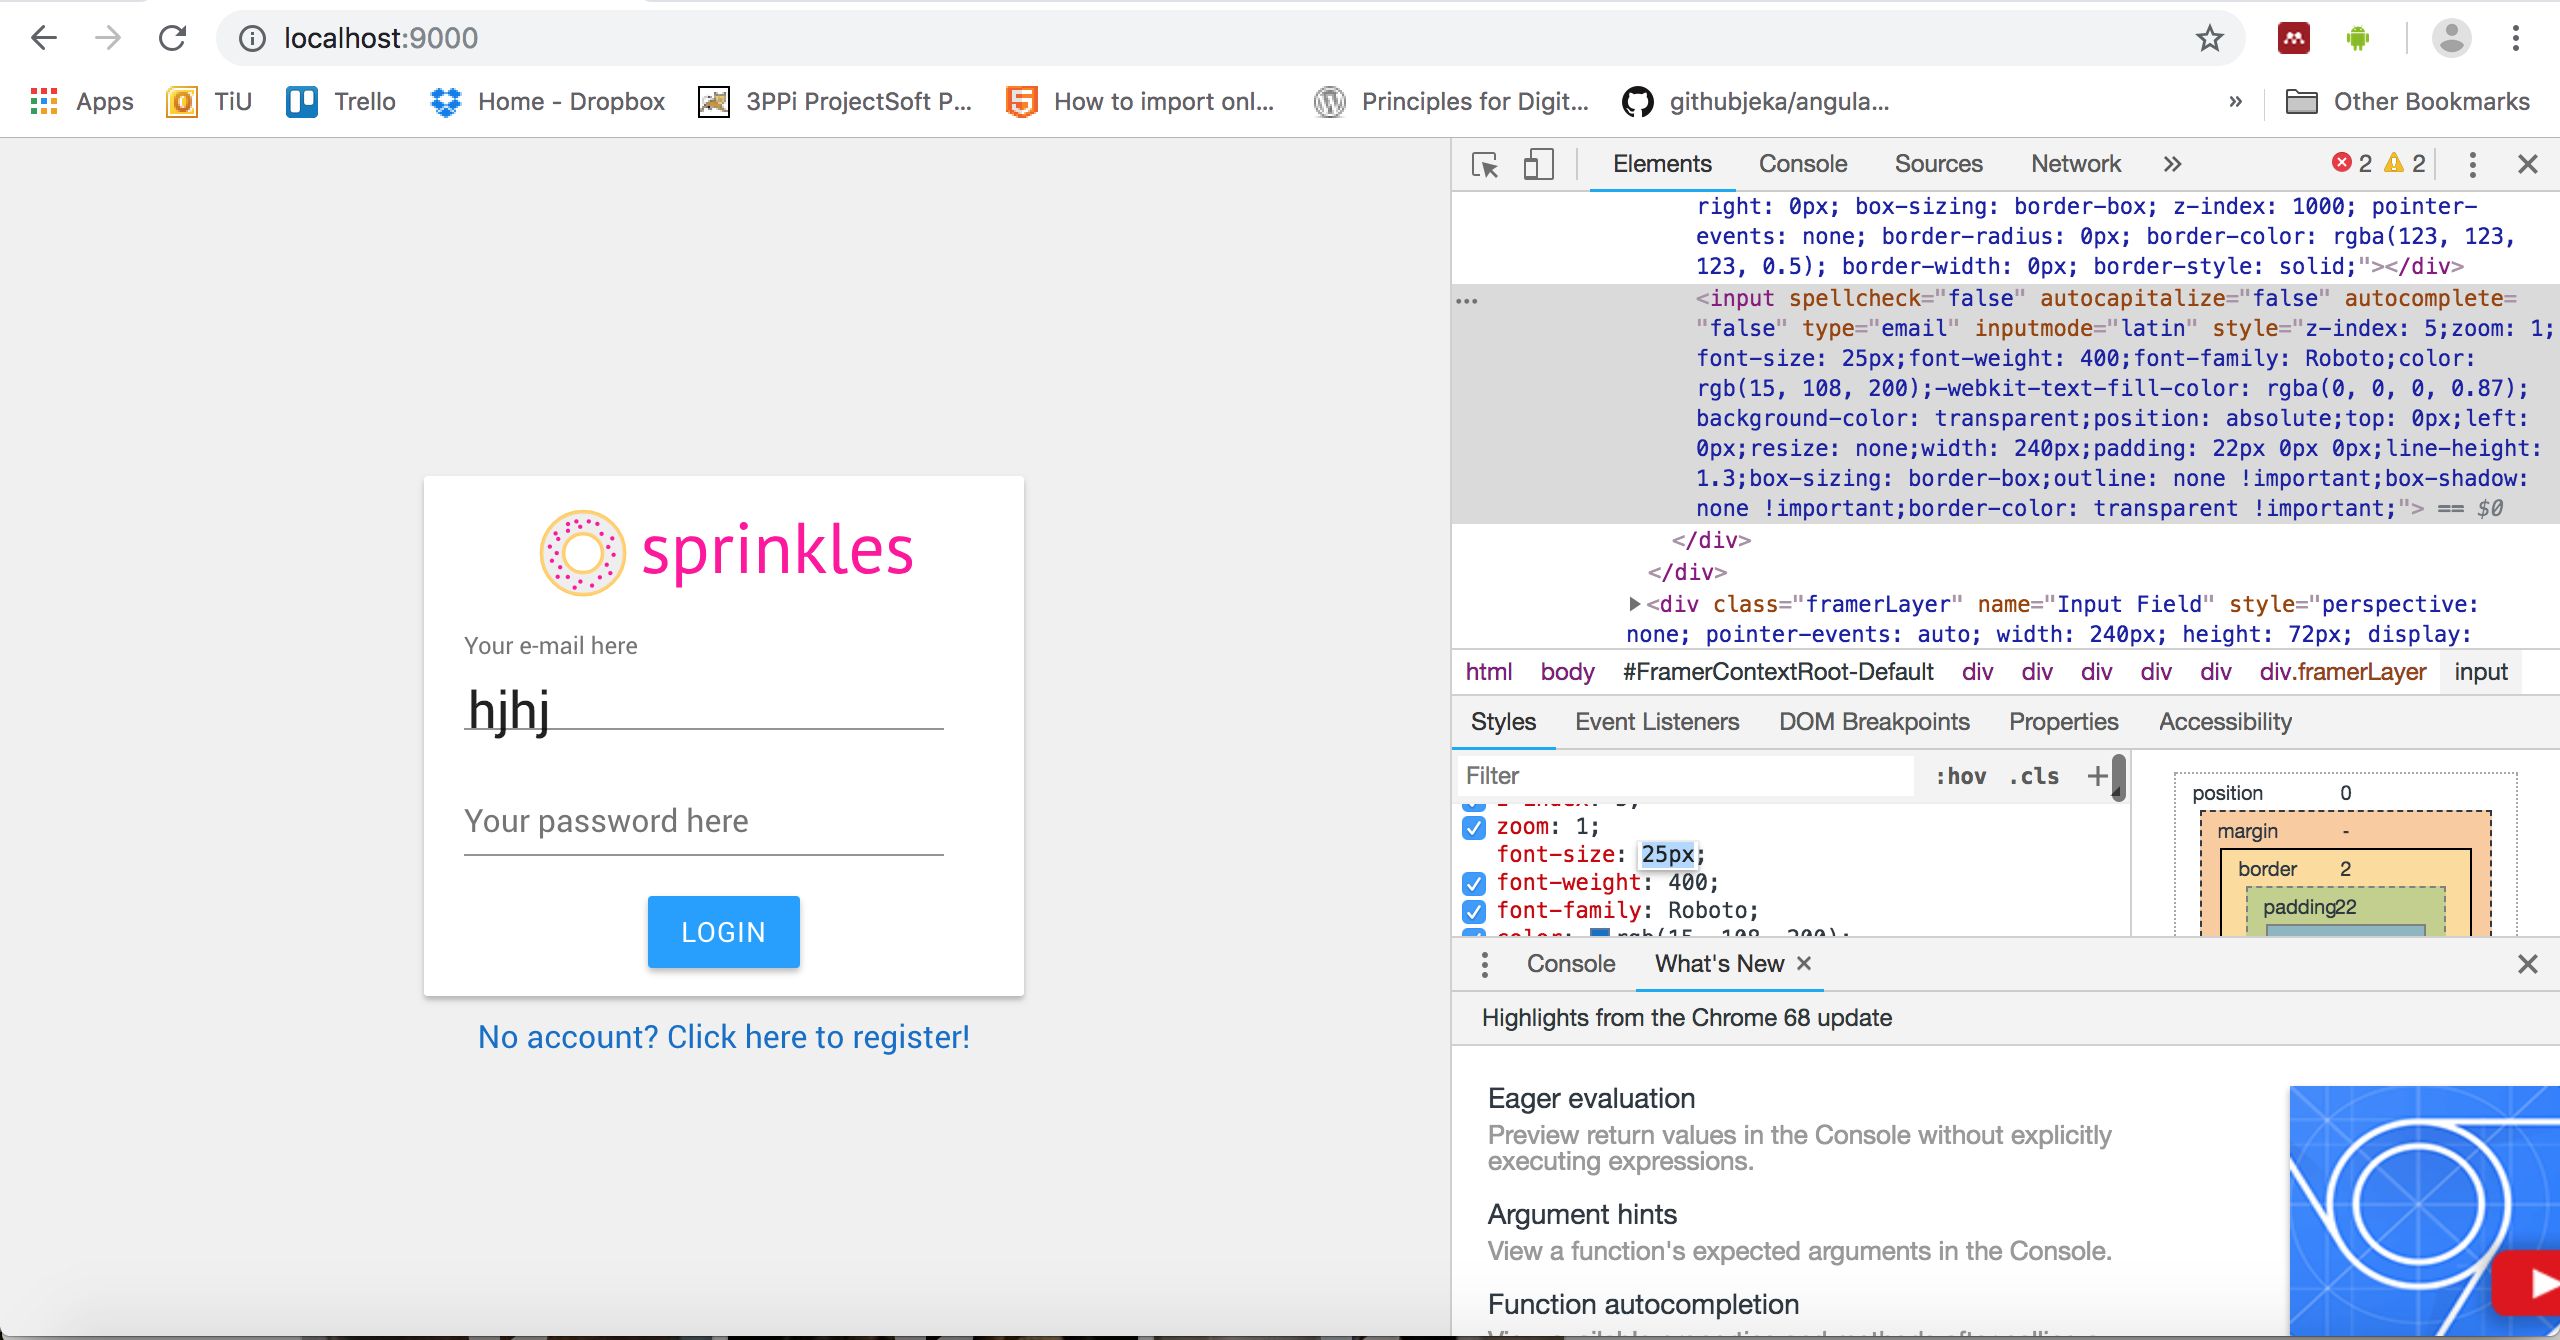
FramerJS automatically generates a pretty complex hierarchy of elements, so it's a bit challenging to navigate through it. However, on a "real" website that is running live, it also allows you to play around with design features as well, turning your browser into a pretty advanced prototyping tool once you get the hang of it! Note that none of the changes you make are stored anywhere, so take note of them before you refresh the website. This is extra challenging with Node.js automatically refreshing the moment you save any changes to your code, beware!
Simulating other devices
Now we get to the good stuff. If we're developing a responsive prototype, or one that is designed for something other than the large screen on which we are developing it, we can test what it will look like from our browser, without having to constantly load it on our actual device (which we will discuss below). Again in the developer tools, note the small icon that looks like a phone and a tablet in the top-left corner. Click on that to enable the device emulation.
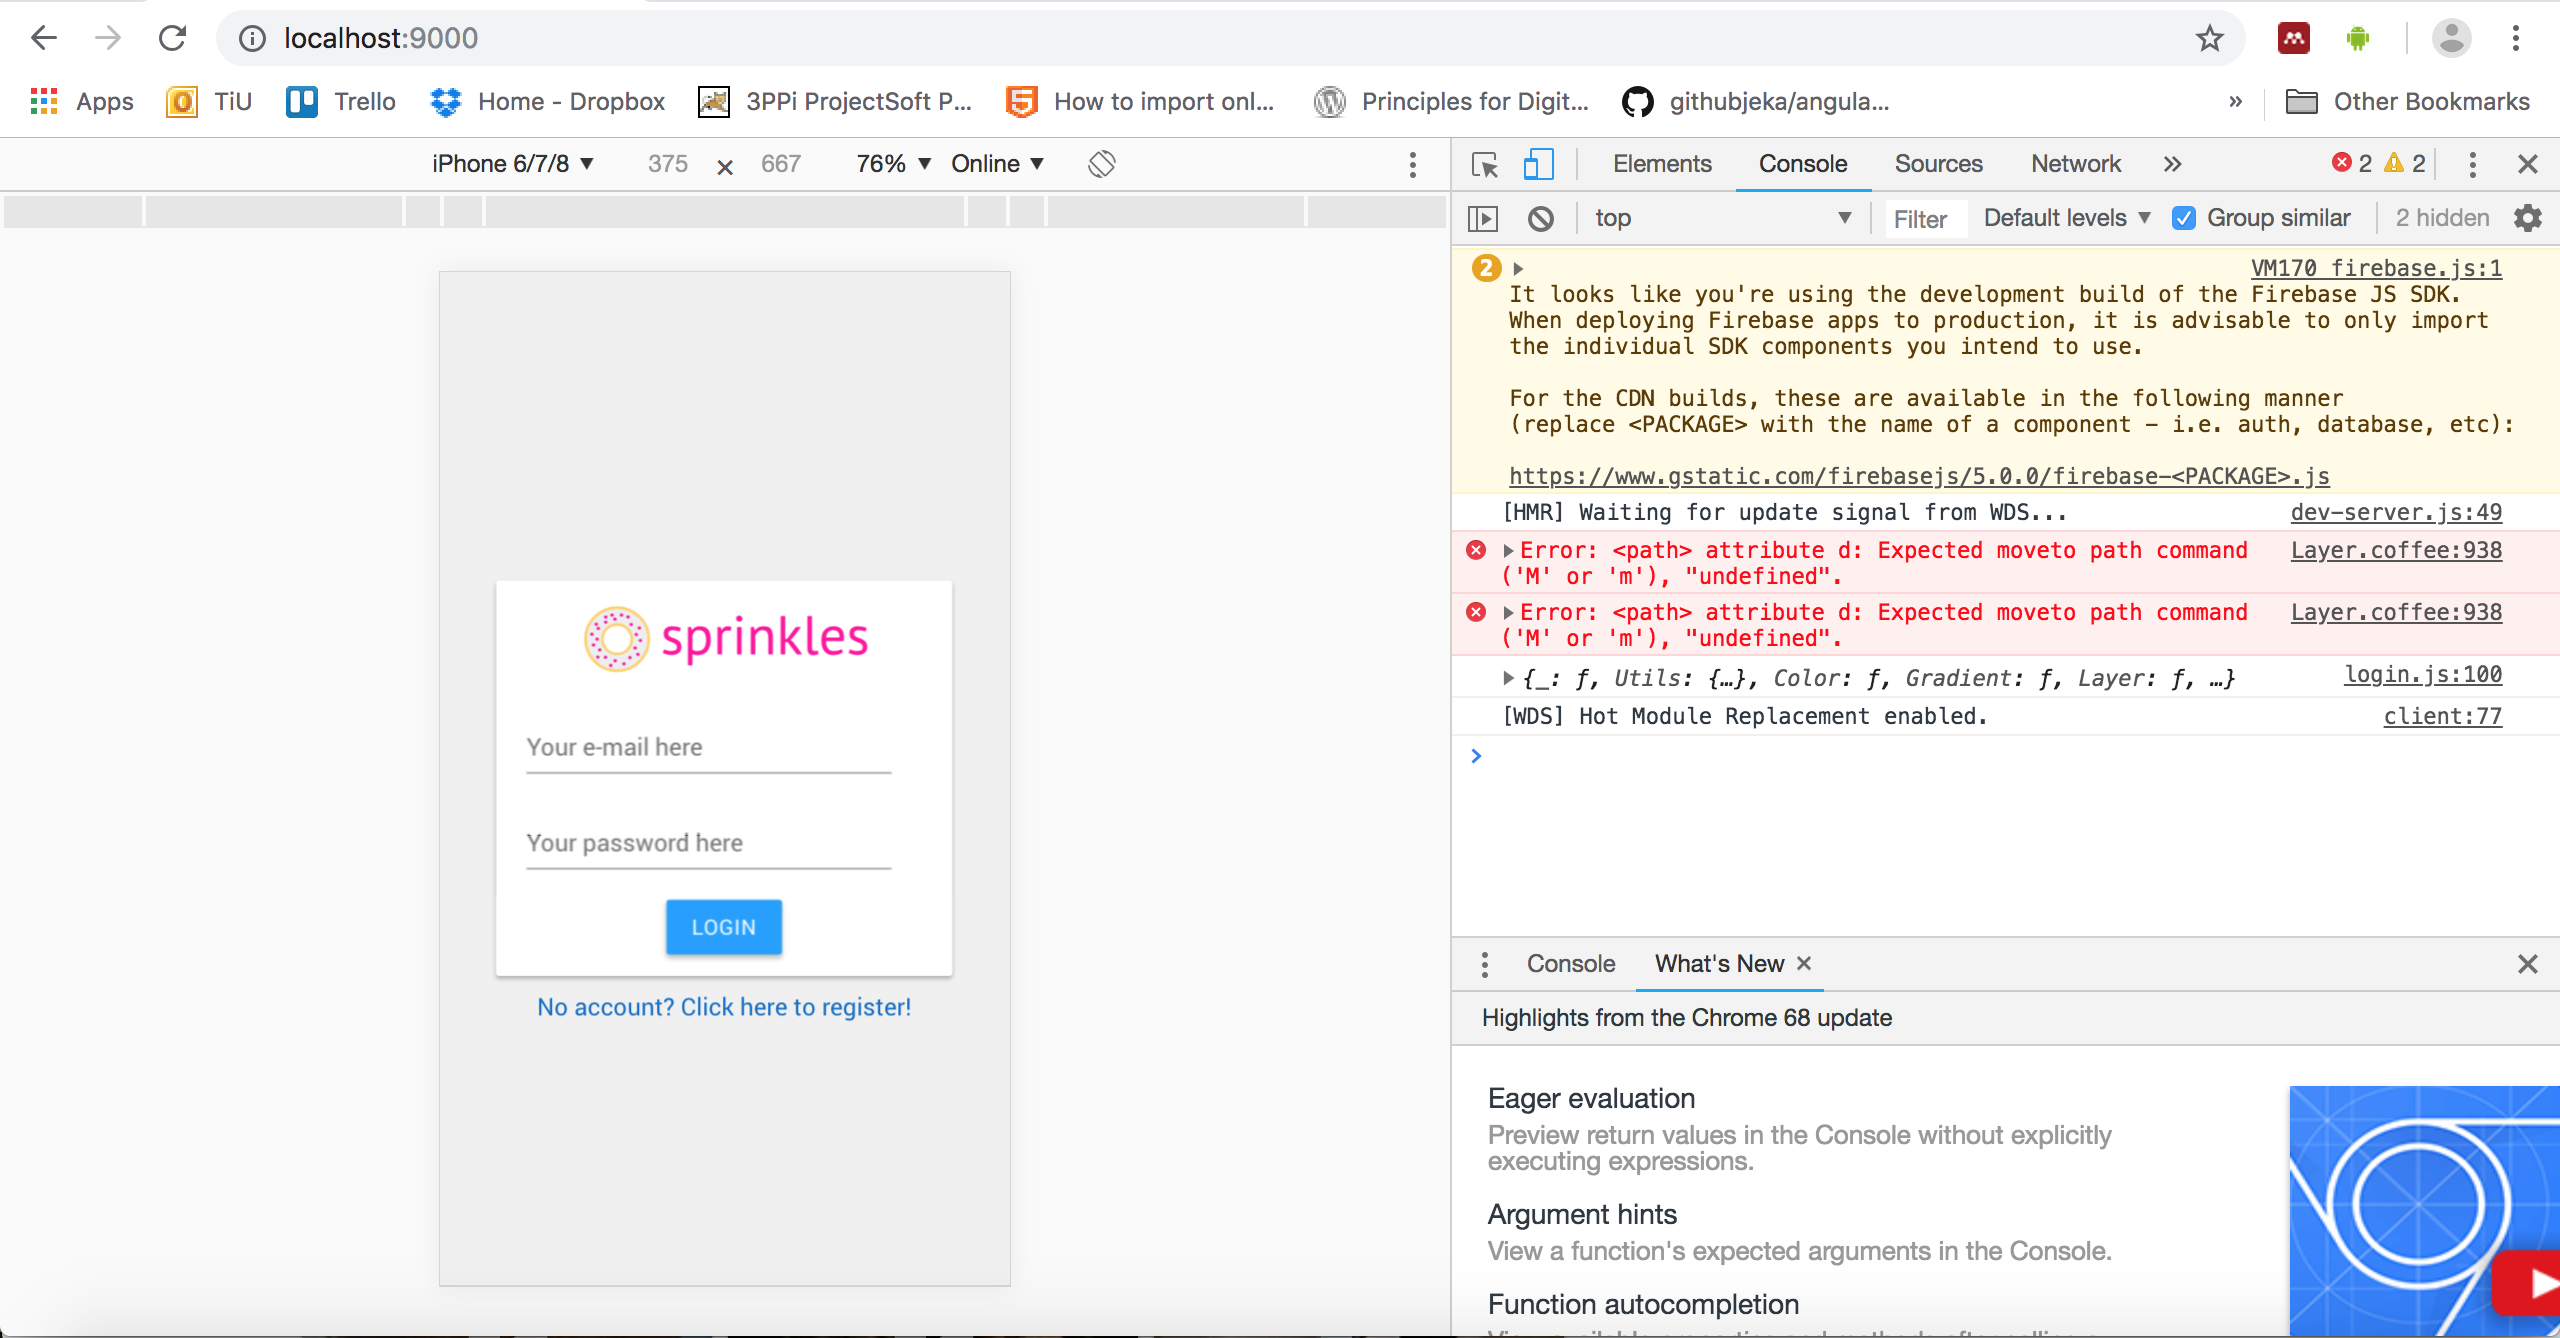
Our setup seems to work well on mobile devices as well, it's almost as if someone was considering this from the start...! You will have several options available to customize the display size of the device you're targeting, with some presets that represent commonly used devices (such as iPhone 6) already defined for you. What this also does is convert all your clicks into touch events instead, so you can test whether they are handled correctly as well.
By the way, Framer also allows you to put a frame of a particular device around your prototype. This is especially nice if you want to show it off on a (portfolio) website, without asking all your visitors to go into developer mode and turn on the simulator. You can do this by adding a small piece of code, for example in your public/index.html file, above the <script src="main.bundle.js"></script>:
<script type="text/javascript">
  var device = new Framer.DeviceView();
  device.setupContext();
  device.deviceType = "iphone-6-spacegray";
</script>
You can find a list of all the different frames — aha, so that's where the name comes from? — in the Framer documentation.
Testing on your device
You might want to test your prototype on the actual device for which it was designed. I made some changes to the configuration of the ECMA-Framer project to allow you to do so, essentially always making your prototype available to the outside world (at least, the network you're on), as long as npm start is running. After that, it's a matter of figuring out at which ip-address your development machine is located and we can use our mobile browser to visit it.
If you're on Mac, you can find out your ip-address by typing ifconfig in a Terminal. Somewhere, in my case next to en0, it should have a line that says something like "inet xxx.xxx.xxx.xxx". Remember the range of numbers that is listed there!
On Windows, the command is ipconfig. After typing that into a command prompt window, you should get a similar overview where there are a bunch of details listed for every network adapter you have. Find the one that's actually connected to something, like your Wireless Network Connection, and note down the number next to "IP Address".
After finding this ip-address, it's just a matter of taking your phone or tablet and opening a browser window there, then navigating to the ip-address you found and appending :9000 to it. So if my ip-address would be 192.168.1.5 (how freaky would it be if that's actually your address), I would open my browser on my phone and navigate to the address: 192.168.1.5:9000
If it doesn't work, you might have to open the firewall on your computer. It might also be a problem with your wifi network's setup, for example I cannot get this to work at the office (eduroam). As a (more labor intensive) fallback, you can choose to publish your prototype somewhere online whenever you want to test on the actual device.
Important note: your ip-address is likely to change the moment you reconnect to the network next time, so you would have to repeat these steps to figure out where to navigate again. But as long as you stay connected, you can keep testing — the webpage on your mobile device should even automatically refresh when you make changes to your code, just like on the development computer!
Adding your app to the home screen
To get the real app feel on our mobile devices, we can add the website we just opened on our mobile browser to our home screen. Note that the same problem holds that was mentioned before: once the development computer is offline, or it reconnects to the network, it might change addresses and therefore your "app" will stop working. This won't be a problem anymore when you start hosting your app online, which will be discussed at the end of this tutorial.
First, let's make everything look a bit nicer by adding an icon and a (suggested) title to our app. We do this in index.html in the public folder within your project, and this only needs to be changed once (unless you want a different icon or title later on). Add the following lines somewhere between <head> and </head>:
<link rel="icon" sizes="192x192" href="images/icon-192.png">
<link rel="apple-touch-icon" sizes="128x128" href="images/icon-128.png">

<title>Sprinkles</title>
What we do here is supply an icon, both for Apple for which the desired resolution is 128x128 pixels, and for Android where an image of 192x192 pixels is requested. I made some official Sprinkles which you can download here. Put these in your public/images/ folder of your project.
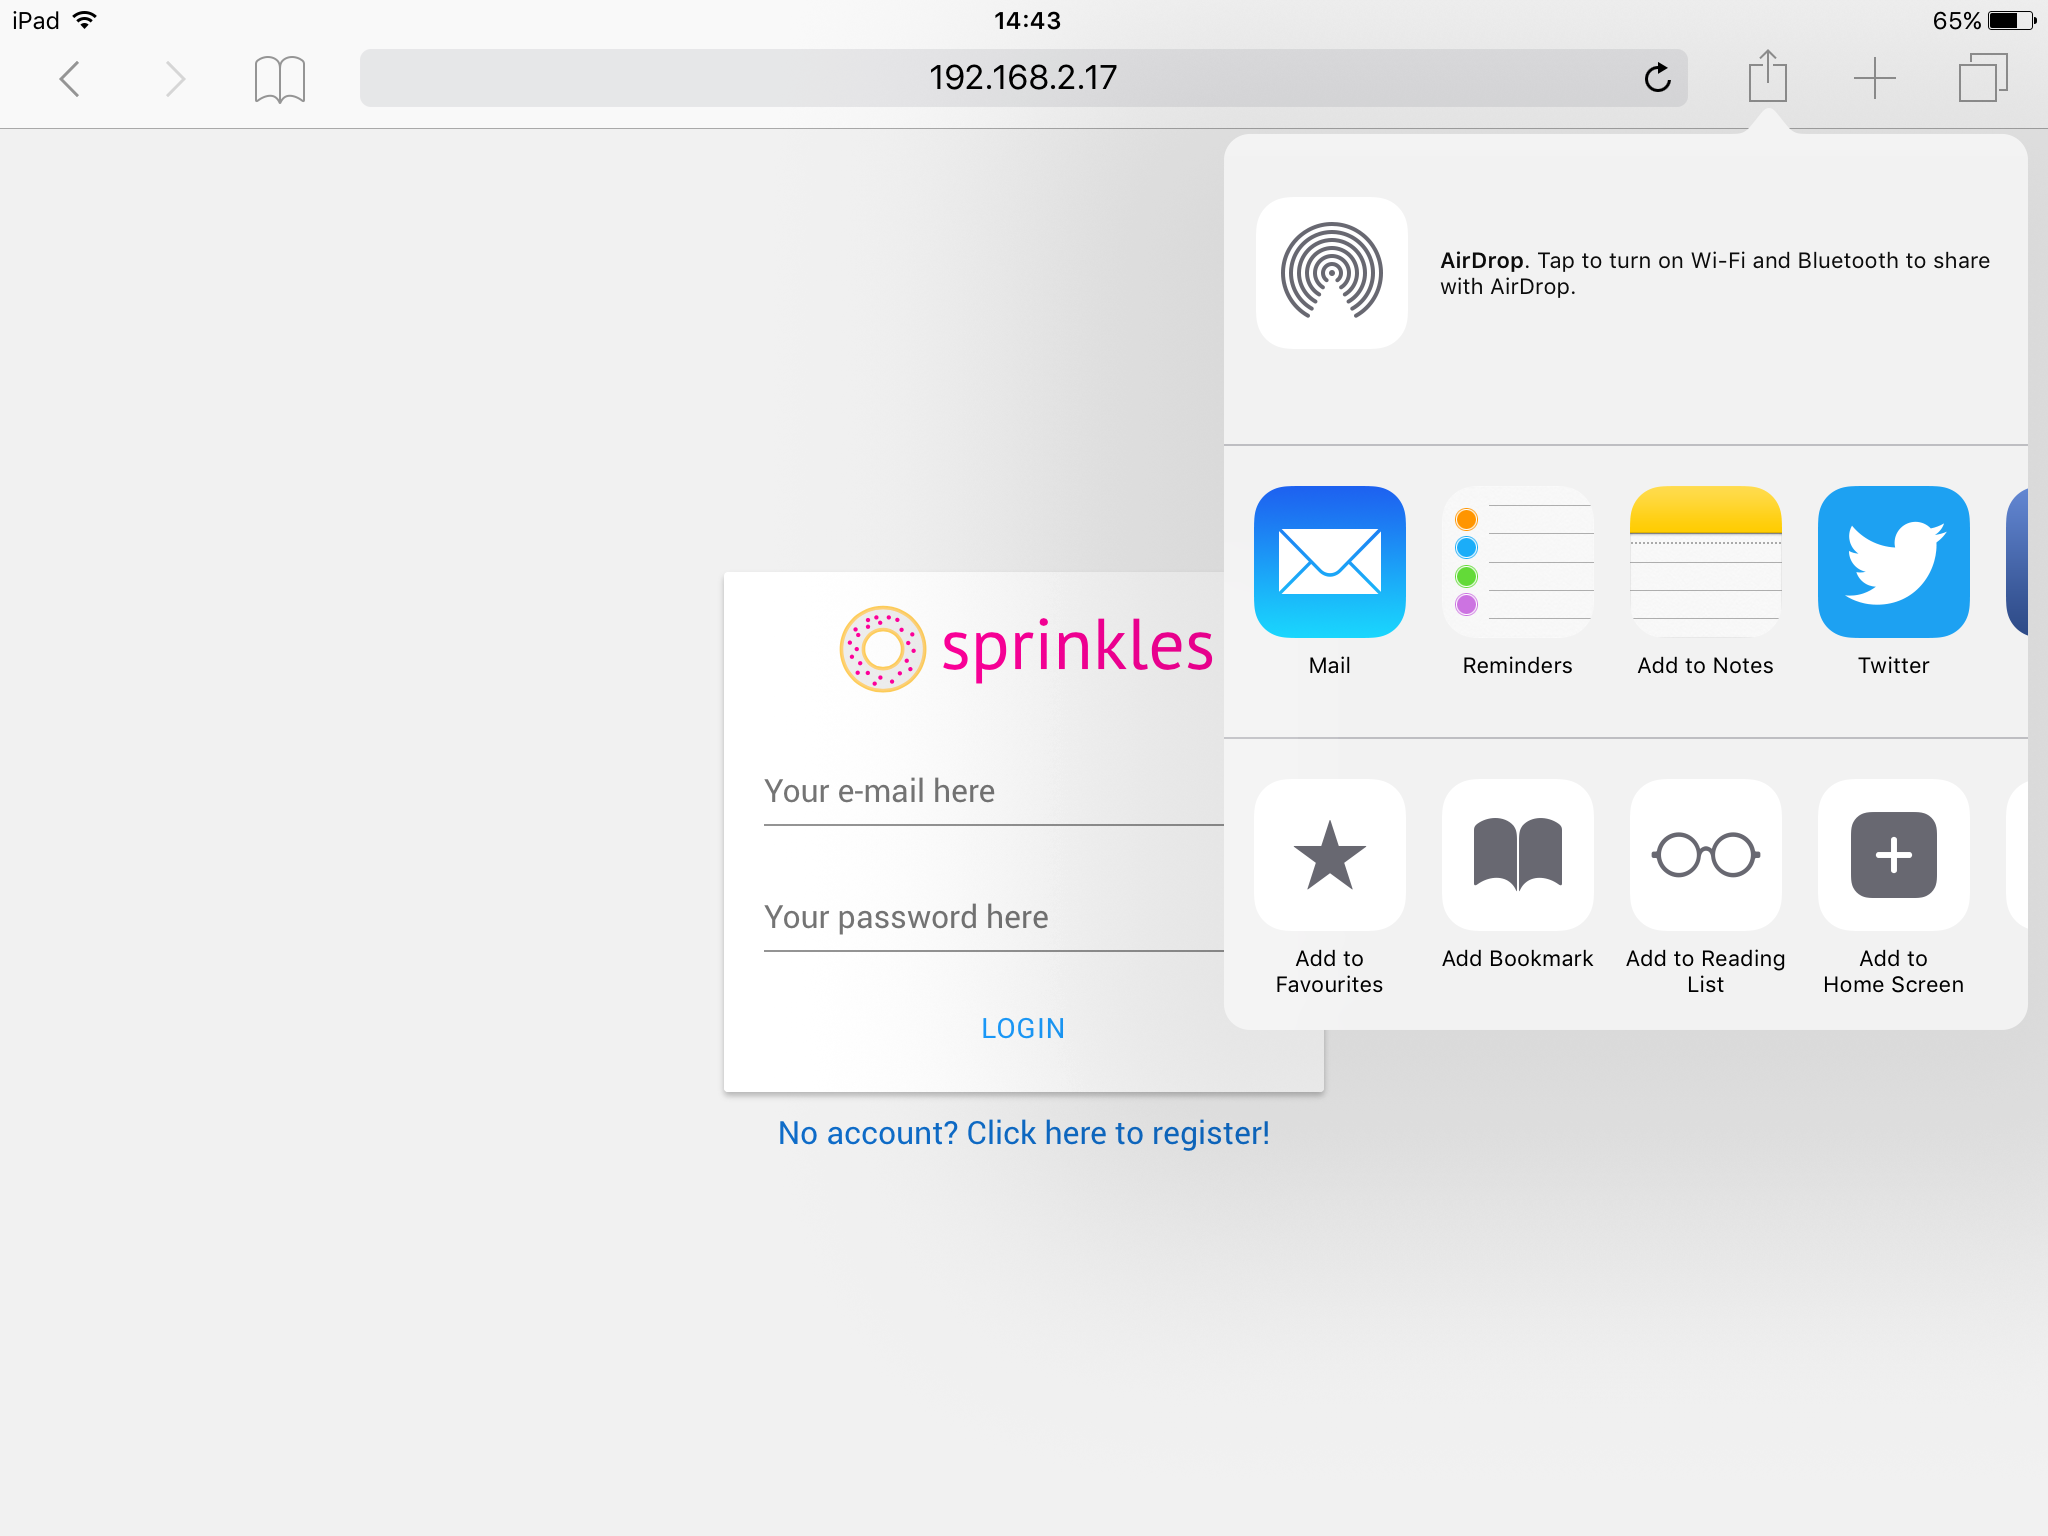
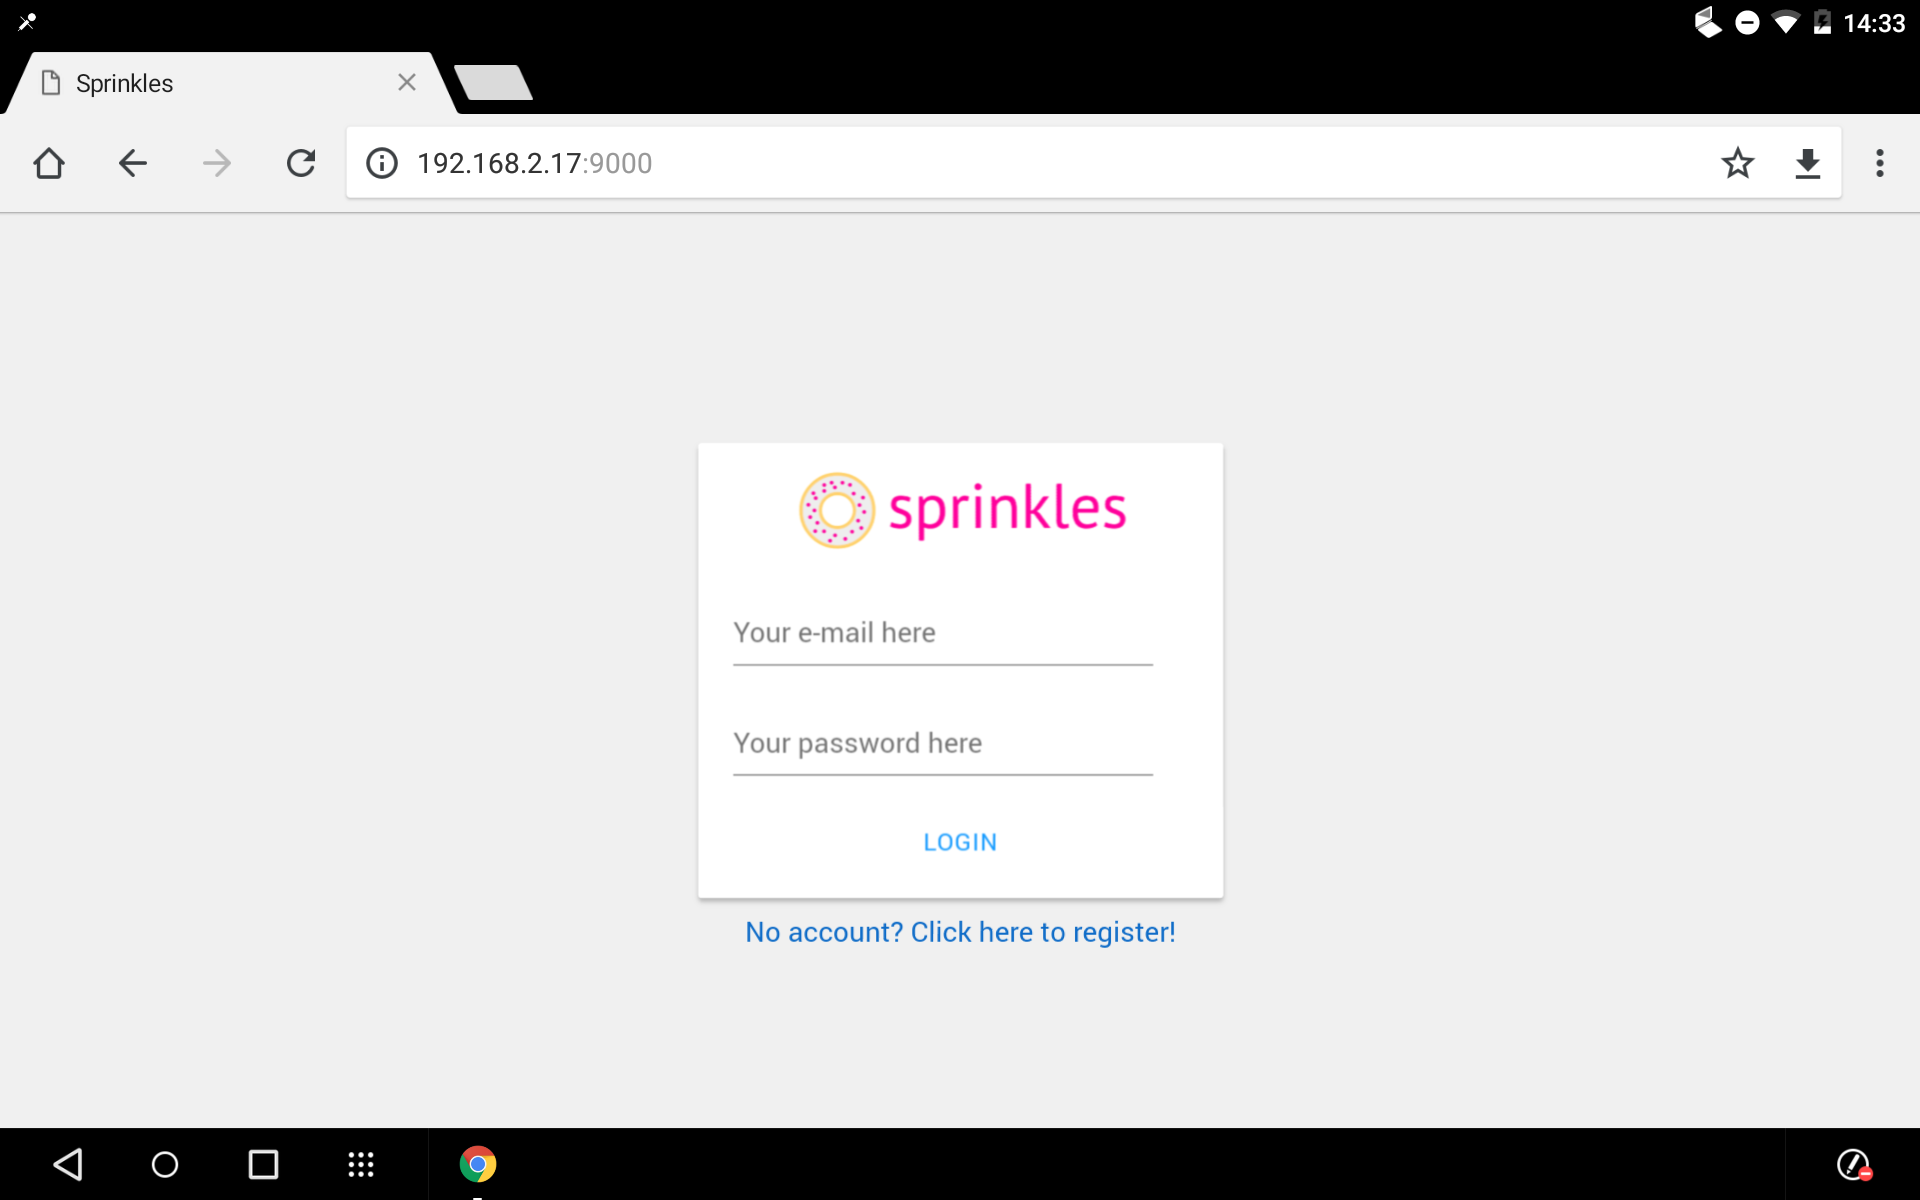
Now, I'm assuming you read the previous section and have learned how to open a browser on your mobile device and navigate to the correct address where the app is running on your computer. If you have the website open, you can easily add it to your home screen. For Apple devices, find the menu option at the top:
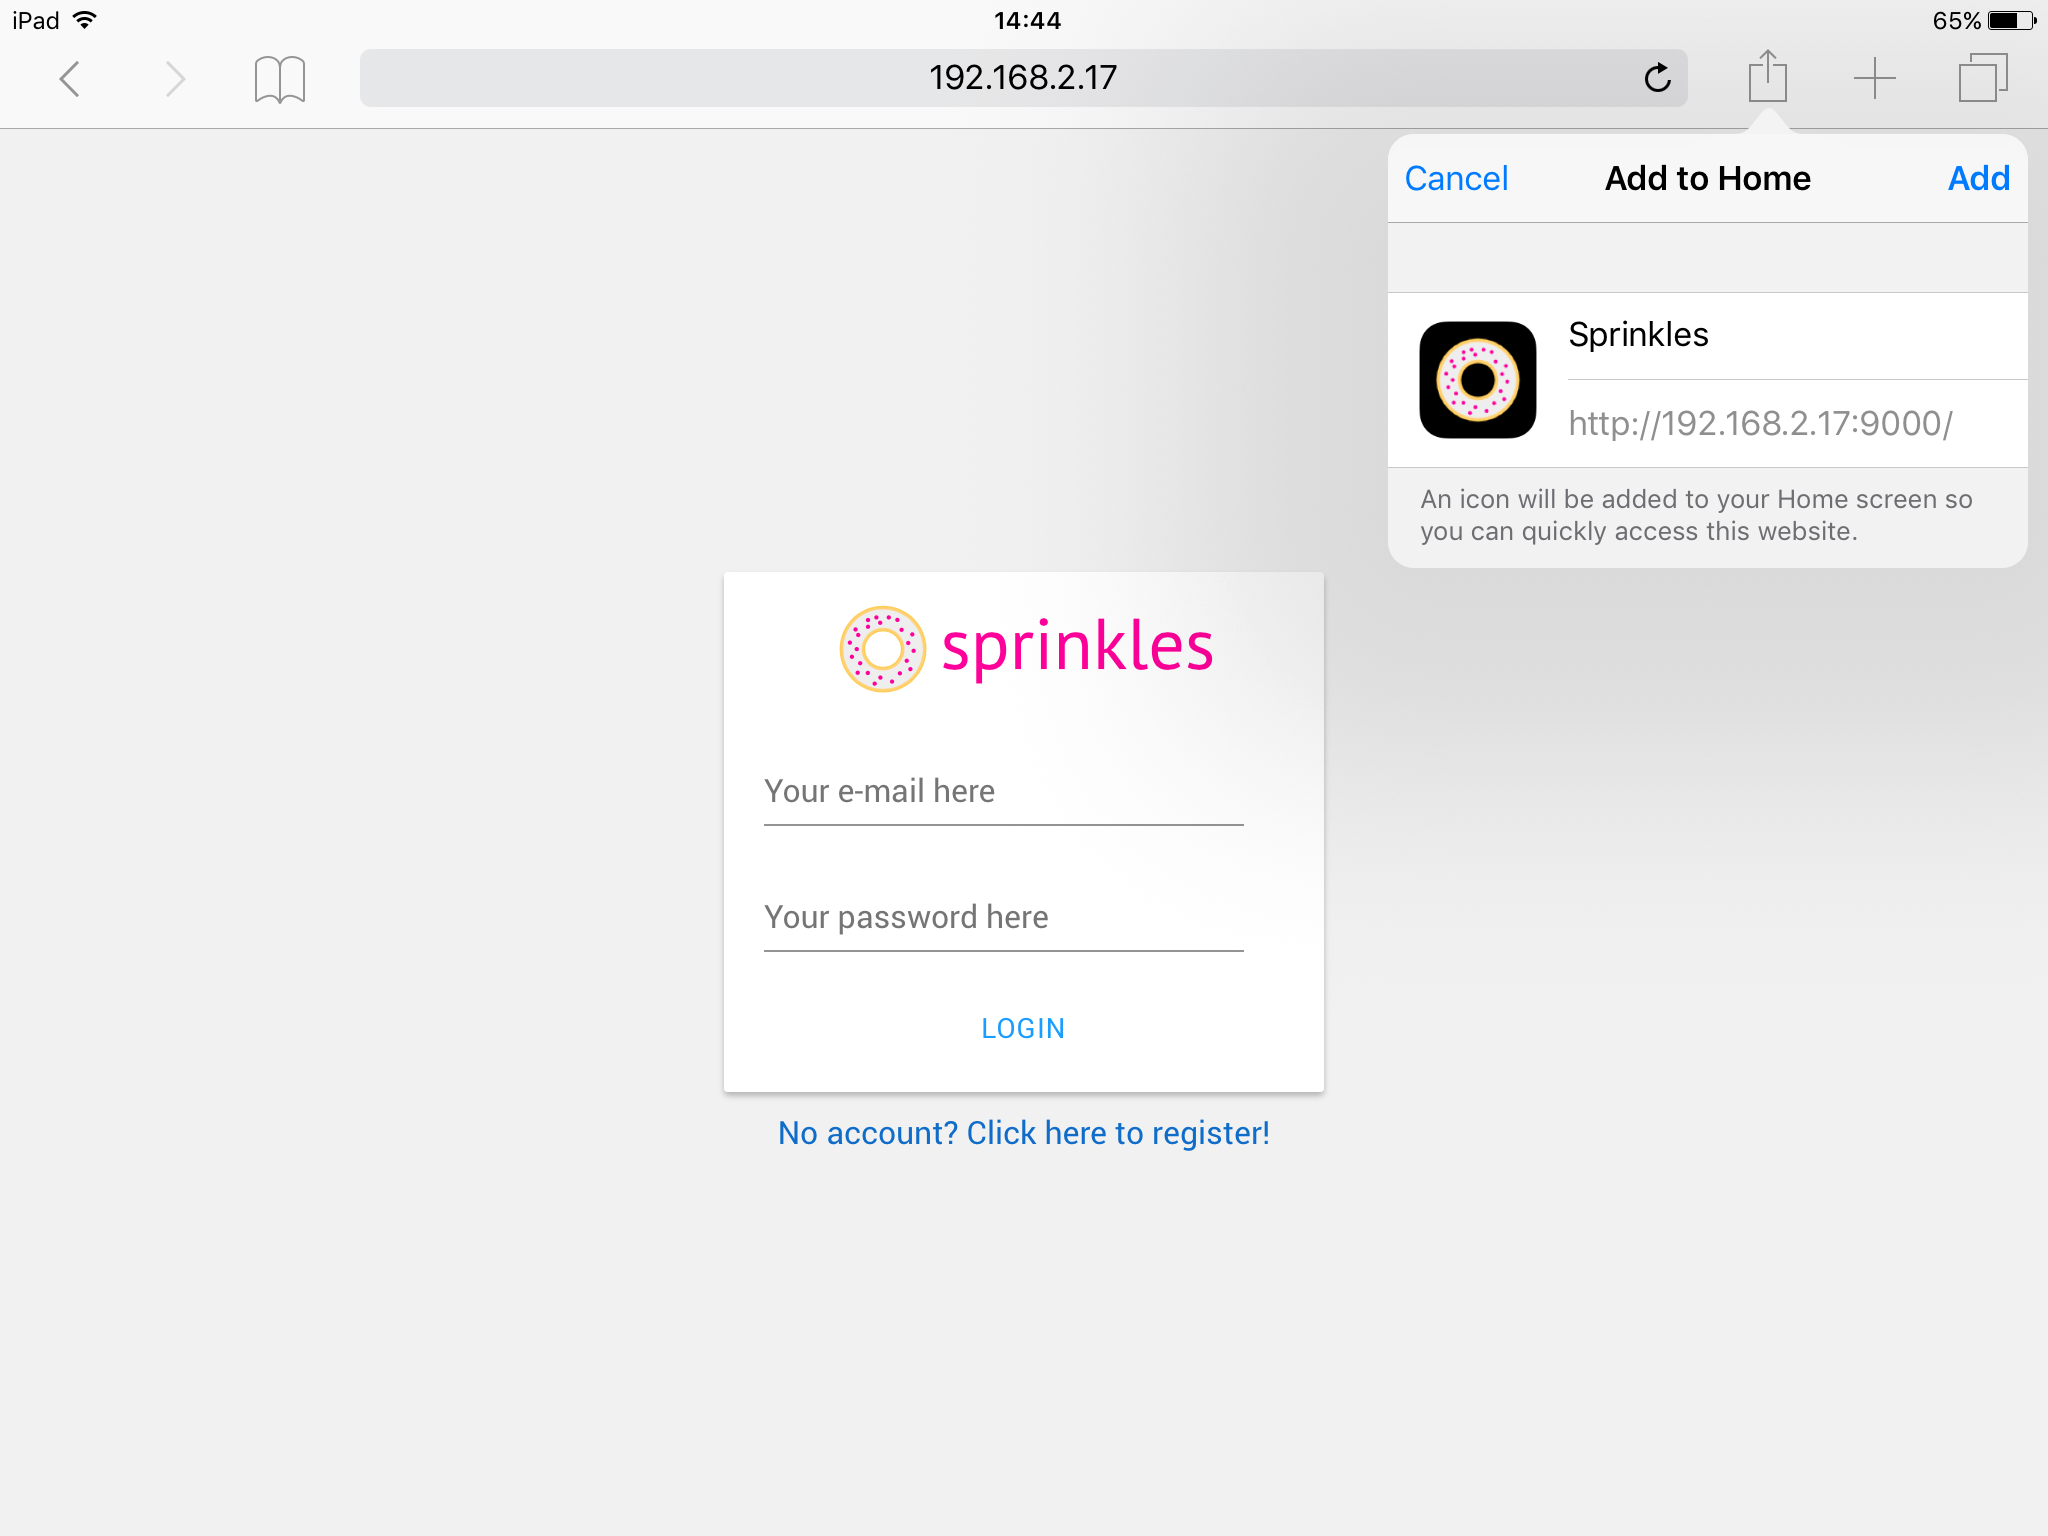
You can then customize the title, and our new icon should pop up (Apple doesn't support transparent backgrounds, so it is turned into black):
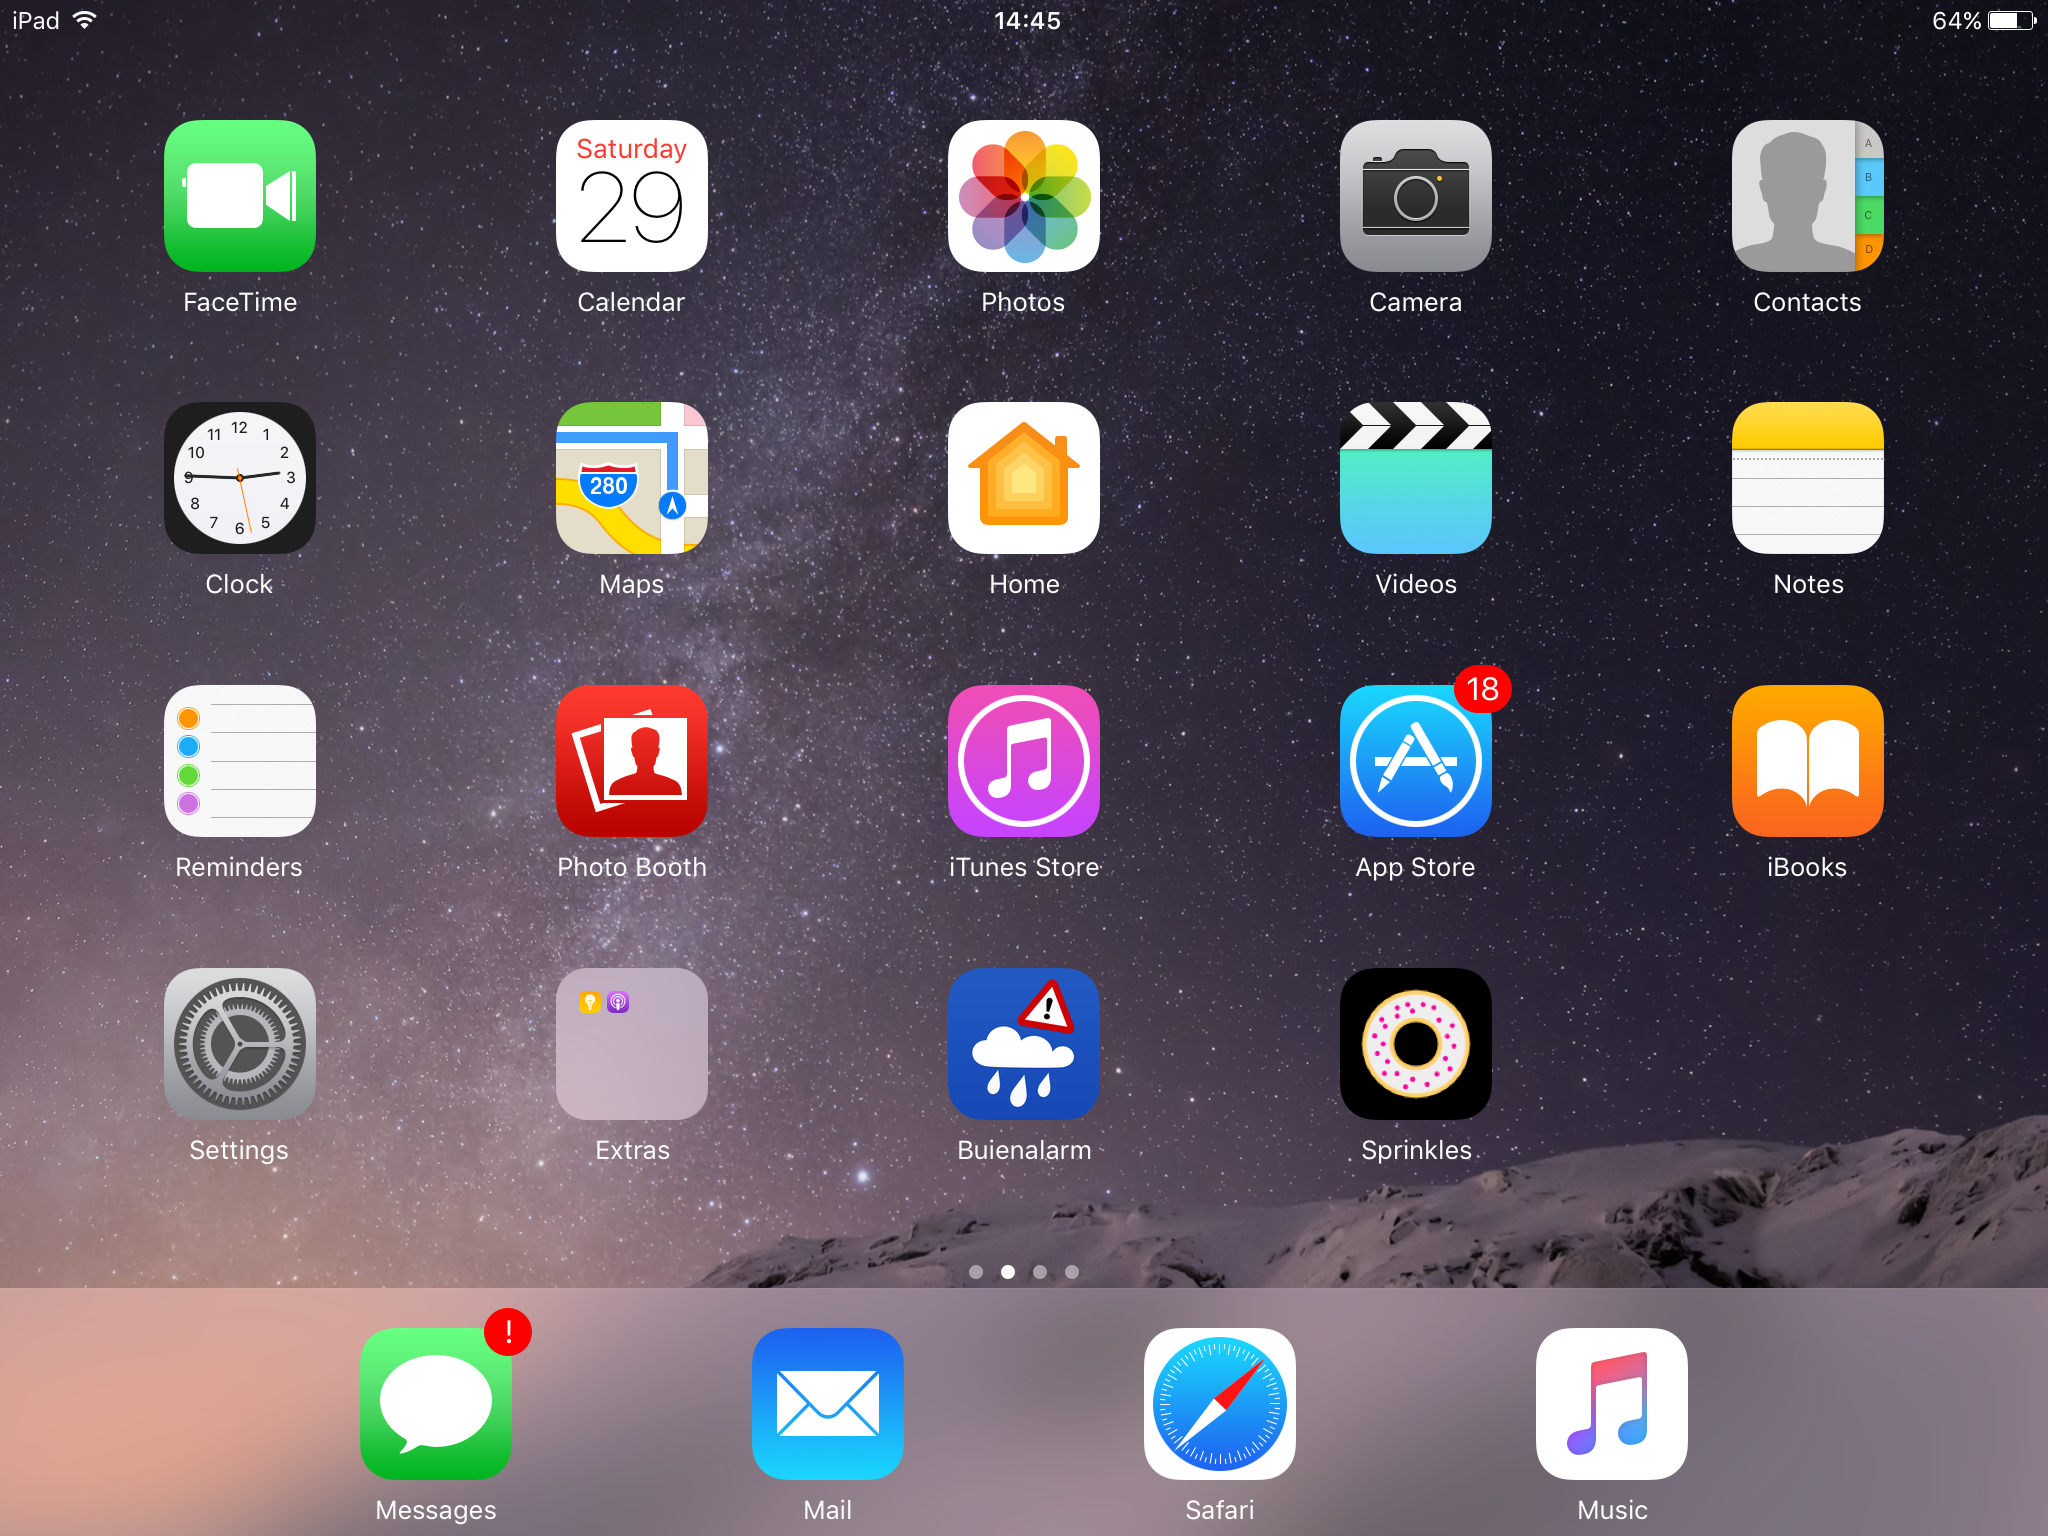
Finally, there it is:
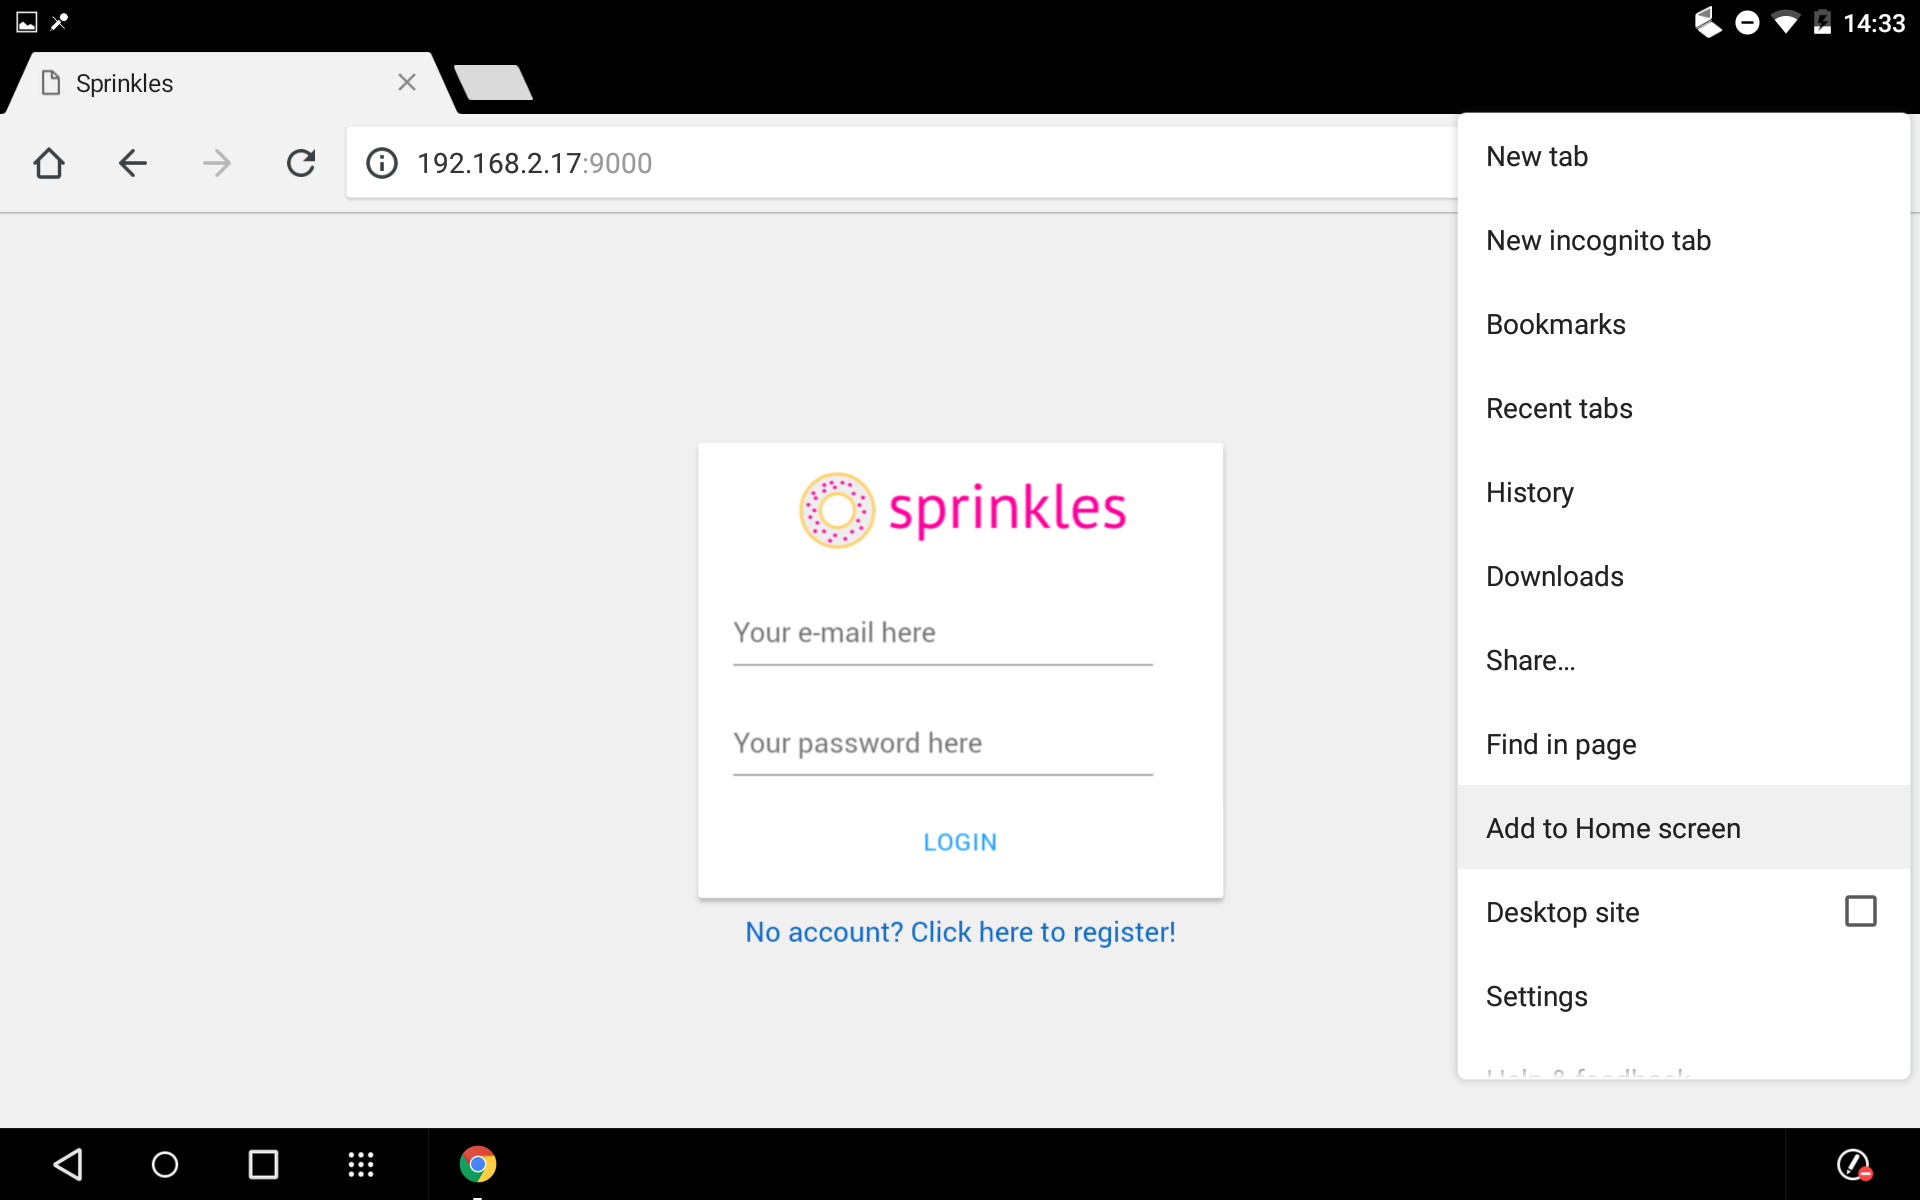
For Android devices, the process is quite similar. First, open the menu in the top right by pressing on the icon with three dots:
Then, choose the option "Add to Home screen":
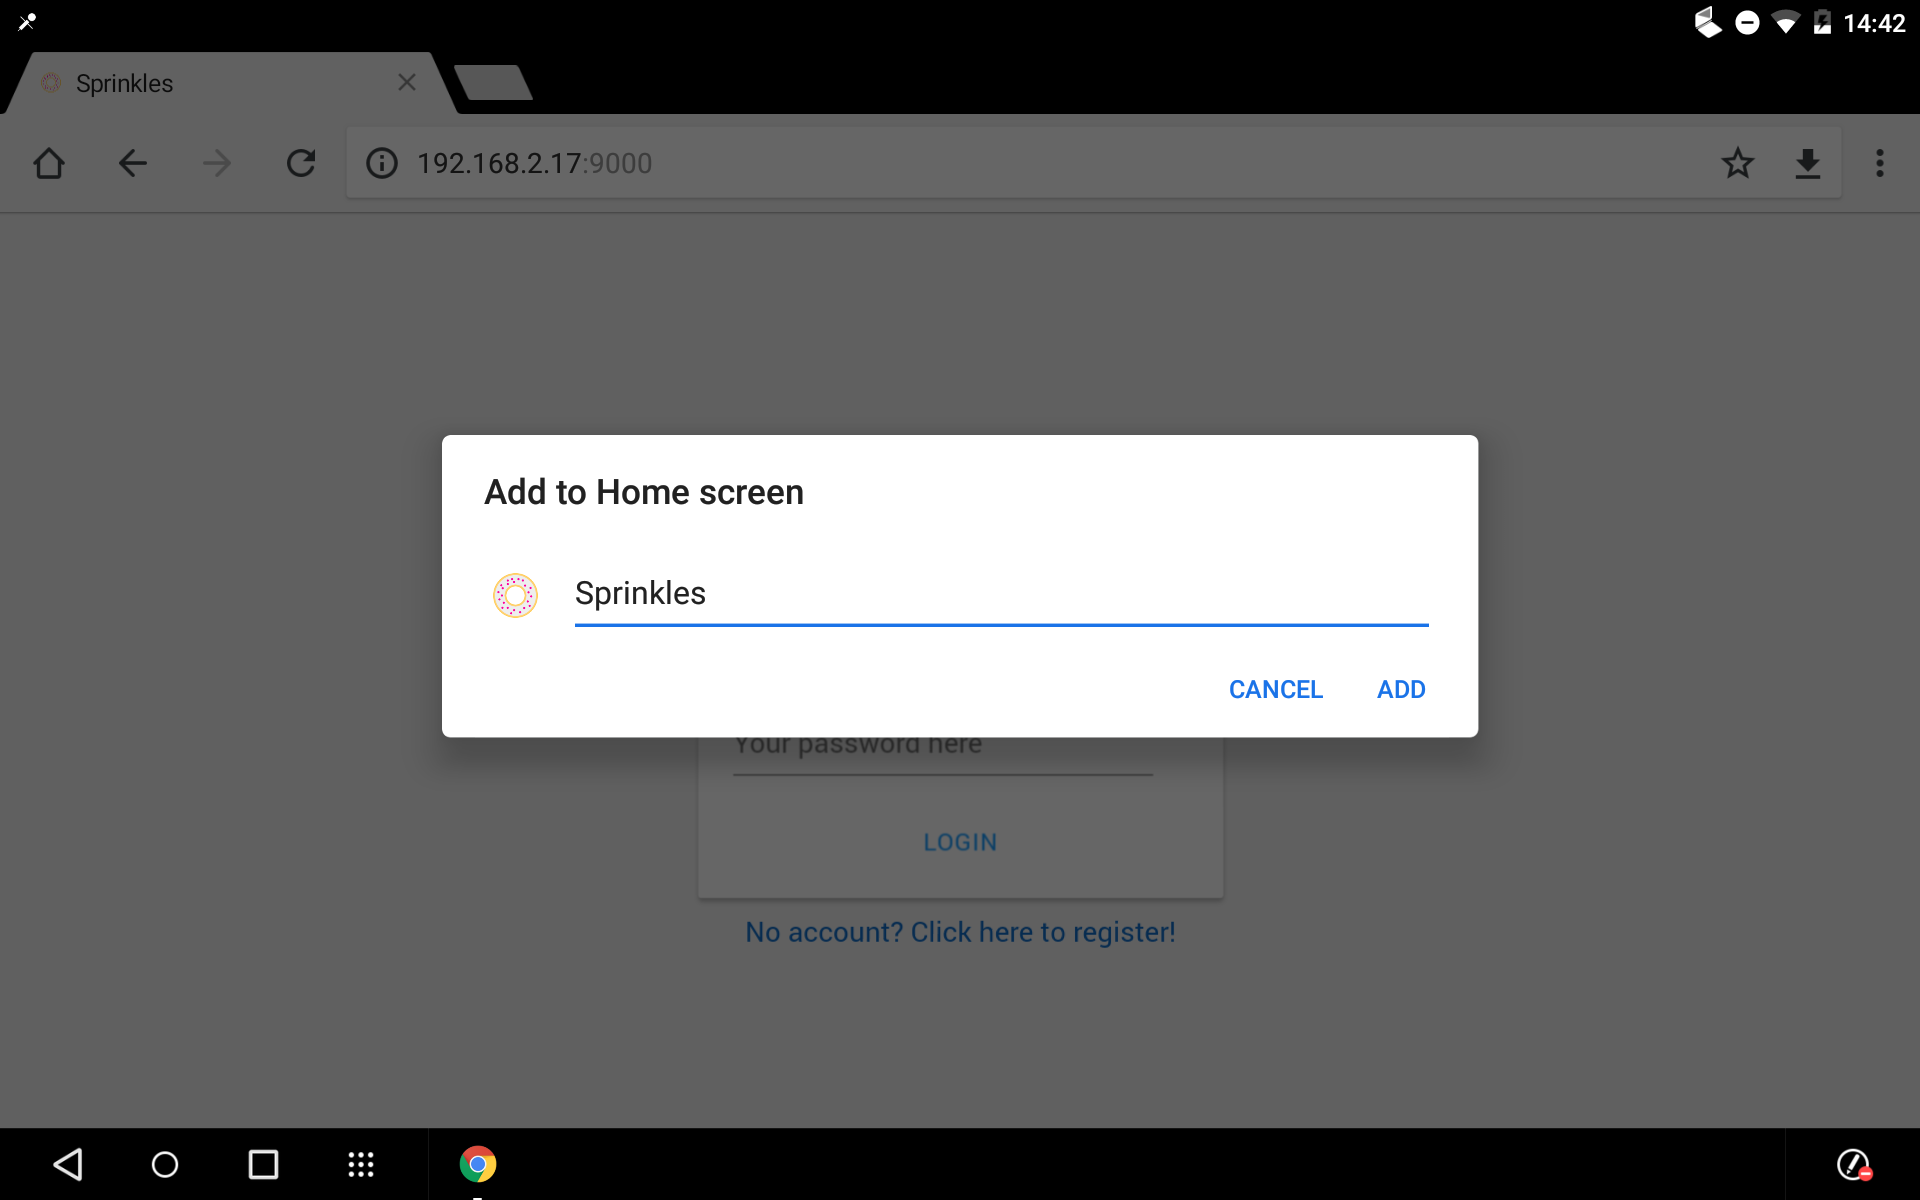
We can again customize if needed:
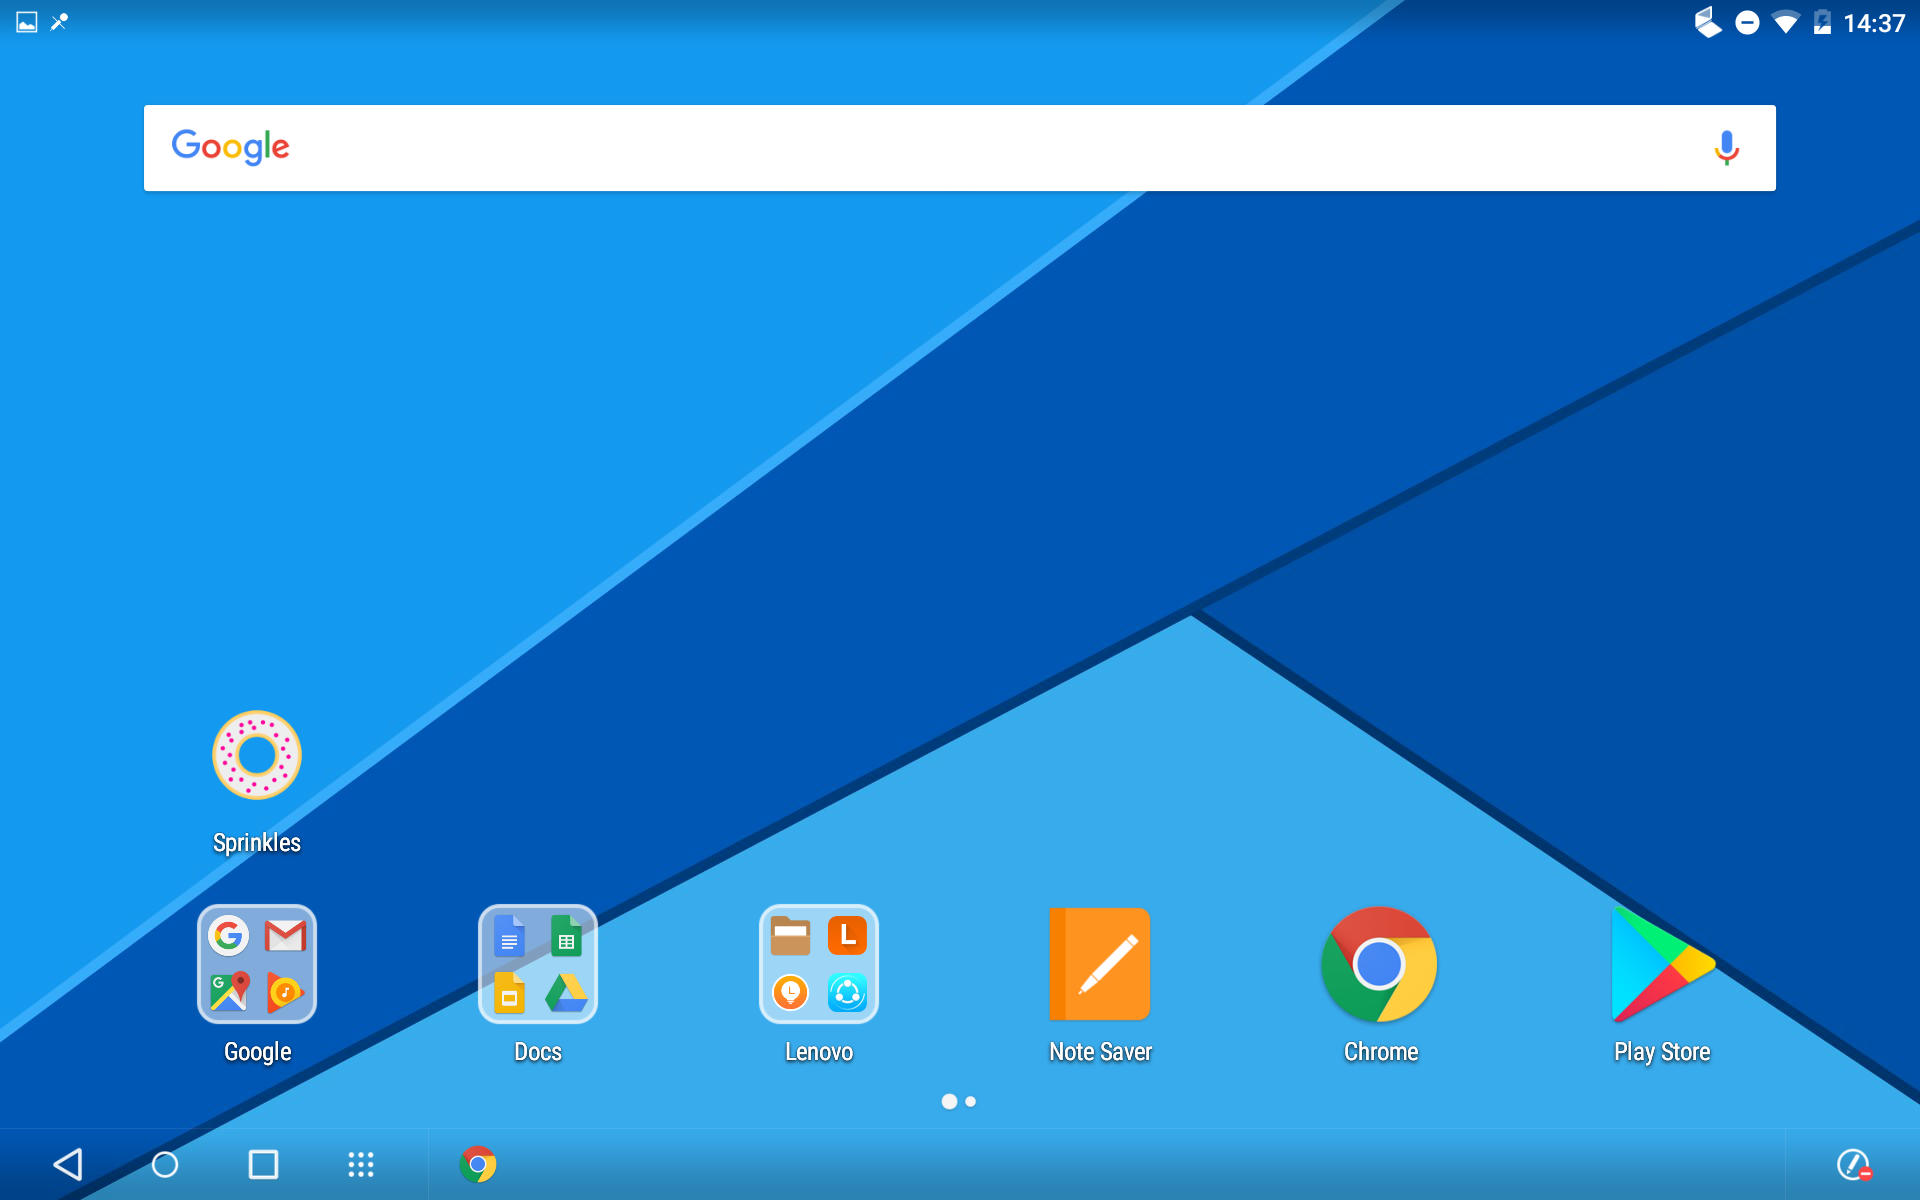
Et voilà:
This concludes the chapter on how to test your code. Let me know if this wasn't thorough enough! We'll learn later how to actually publish and share your code online so that you can do user testing on the user's device, or even remotely. But first, let's find us someone to talk to!